
How To Plate Food Like a Chef: Learn the Secrets the Pros Use
Learn how to plate food like a chef with essential plating tips, tools, and step-by-step instructions. Plus, gain expert insights from pro chefs.
Author
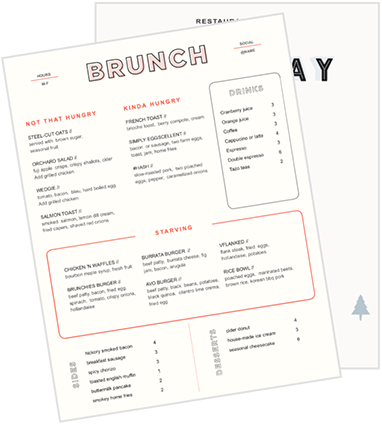
Restaurant Menu Templates
Use these menu templates as a starting point for your menu design or to give your menus a refresh.
Get Free DownloadPlating like a chef isn’t about stacking food into sky-high towers or dotting the plate with sauce just because it looks fancy. It’s about intention—guiding the eye, highlighting flavor, and turning a dish into an experience.
Here’s one secret the pros use: plating food in odd numbers (like five ravioli instead of four) makes dishes more appealing. Why? Because our brains take 20% longer to process odd-numbered groupings—which means diners spend more time looking at (and getting excited about) the plate in front of them.
In this guide, we’ll break down the fundamentals of professional plating, essential tools to have on hand, and insights from award-winning chefs—so every dish that leaves your kitchen looks as good as it tastes.
Key takeaways
Every plate should have purpose and structure—start with simple frameworks like the clock method or rule of thirds.
The right tools (tweezers, squeeze bottles, plating spoons) make clean, consistent presentations repeatable.
Balance color, texture, height, and spacing to keep the dish visually engaging and easy to eat.
Garnishes, sauces, and negative space should all support flavor and focus—not just add flair.
Plating like a chef is a skill you build—practice each element, refine your eye, and aim for consistency.
Restaurant Menu Templates
Use these menu templates as a starting point for your menu design or to give your menus a refresh.

10 key elements of plating food like a chef
Great plating is all about making thoughtful choices from the ground up. These elements are the building blocks chefs use to create dishes that look polished, balanced, and professional.
1. Choose the right plate
Before any food hits the plate, the plate itself sets the tone. The right dish enhances color, shapes the composition, and defines the overall vibe of your plating. Choose wisely, and you’re halfway to a great-looking dish.
Color: White plates are a classic for a reason—they make food pop. Dark or colored plates can be striking but should complement the dish, not compete with it.
Size: Choose a plate that frames the food without crowding or making it look sparse. The right amount of white space elevates the presentation.
Shape: Round plates are universal and forgiving. Square or asymmetrical plates lend themselves to modern, stylized presentations.
Cleanliness: A pristine rim is non-negotiable, so always wipe the edges before serving. This small step signals a high level of care.
2. Use the clock method for balanced layouts
The clock method is a classic plating technique that brings structure and consistency to your presentation. It’s especially useful in fast-paced kitchens where you want every dish to look polished—without overthinking it.
Visualize a clock face: Picture the plate as a clock, with 12 at the top and 6 at the bottom, from the diner’s perspective.
Place the protein at 6 o’clock: This grounds the dish and creates a natural focal point.
Add the starch between 9 and 12: It balances the plate with visual weight and substance.
Arrange vegetables between 12 and 3: This adds color and freshness while rounding out the composition.
Maintain clear spacing: Each element should have its own space—no overlapping unless it’s intentional.
Once you’ve mastered the clock method, you can start breaking the rules. But as a foundation, it helps every plate look well-proportioned and thoughtful.
3. Master the rule of thirds
The rule of thirds is a simple way to create visual interest and professional-looking plates. Borrowed from photography, it helps you move away from static, overly centered presentations and into layouts that feel dynamic and intentional.
Grid it out: Imagine your plate divided into a 3×3 grid. This mental framework helps guide placement without overcrowding.
Offset your focal point: Place the main element (often the protein) slightly off-center to draw the eye and create flow.
Follow the lines: Arrange sides and garnishes along the grid’s lines to create balance and movement.
Avoid symmetry: A perfectly centered plate can feel flat—this technique helps add depth and energy.
4. Create height and dimension
Flat plates look unfinished. By adding layers and vertical elements, you can make a dish feel more dynamic and refined without complicating execution.
Stack strategically: Layer or lean components to build height without overwhelming the plate.
Mix textures: Use contrasting elements, like creamy purées with crispy toppings, to keep the eye engaged.
Draw the eye upward: Elements with natural height (like seared scallops or roasted carrots) can help lead the visual flow.
Don’t overdo it: Height should feel intentional, not precarious. Aim for structure, not a balancing act.
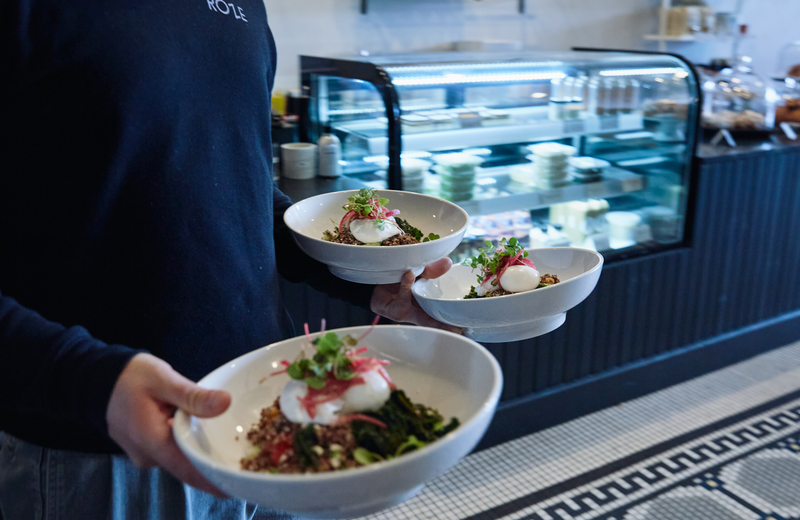
5. Prioritize color and contrast
Color is one of the first things diners notice. A thoughtfully colored plate doesn’t just look better—it can actually make food seem fresher, more flavorful, and more exciting. Executive Chef Thomas Wiswell of Drift highlights how visual impact matters more than ever:
“There has to be a textural contrast, and you want things to be colorful because people are taking photos with their phones… What you’re putting out there is getting posted.”
Use complementary colors: Pair opposites on the color wheel—like green and red or orange and blue—for visual impact.
Preserve vibrancy through technique: Blanching, shocking, or lightly roasting veggies can help maintain bold natural color.
Add contrast with garnish: Even neutral-toned dishes can pop with a sprinkle of herbs, citrus zest, or colorful sauces.
Don’t overload the palette: Too many colors can feel chaotic. Aim for contrast, not a rainbow.
6. Nail the sauce application
How you apply sauces can instantly separate an amateur plate from a professional one. Done well, sauces act as both a design element and a functional flavor enhancer. Andreas Seidel, executive chef of Strip House in New York City, explains his visual approach:
“Place a dollop of sauce on the plate, then drag the back of the spoon through the sauce in one swift movement. The lines and shapes will add a visual contrast… Sauces can be used as a base layer of color on the plate, with the rest of the food placed on top.”
Dot or dab for precision: Use the back of a spoon or squeeze bottle to create clean, consistent shapes.
Swoosh for elegance: Place a small amount of sauce on the plate and pull through it with a spoon for a refined streak.
Brush for artistry: Use a pastry brush to paint sauces directly onto the plate—great for bold flavors or purees.
Keep control: Too much sauce can overwhelm the dish. Use restraint and place it with intention.
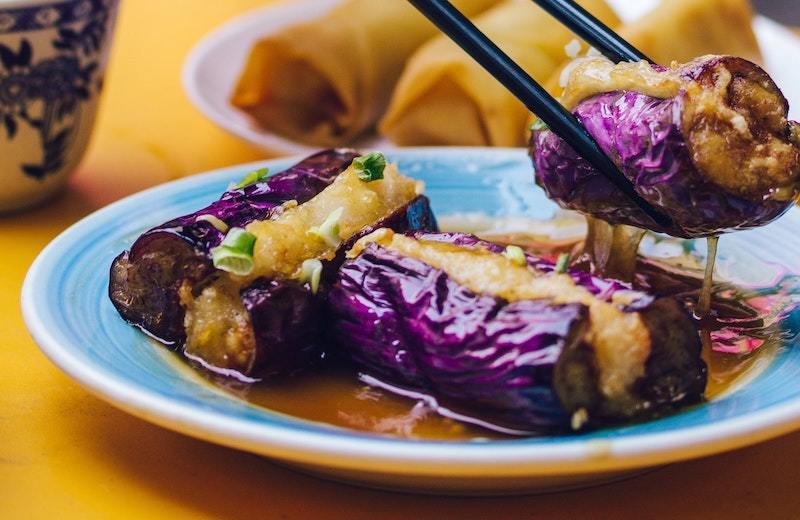
7. Think about texture
Plating is also about engaging all the senses. A dish with only soft or creamy elements can fall flat, no matter how great it tastes. Texture adds contrast, surprise, and satisfaction.
Layer soft with crisp: Pair smooth purees with crunchy toppings or crispy proteins for balance.
Use texture to guide the bite: A crumble, chip, or puff can add structure to softer components.
Think about the overall experience: Every plate should include a variety of mouthfeels—creamy, crunchy, tender, crisp.
Don’t forget temperature: Hot-and-cold contrasts (like warm cake and cold cream) can enhance texture perception.
8. Garnish with purpose
The best garnishes tie the dish together, either by echoing a flavor, adding contrast, or offering a final pop of color. Chef Kirk Westaway of JAAN explains his approach:
“I always try to plate things naturally and every single plate is distinct because each product is different. The focus remains on the produce, the technique is essential, but it all begins with the best available ingredient. Every ingredient on the plate has its purpose, which is to enhance the flavours of the dish, and I love using various herbs and flowers that are available every season to elevate the dish. For example, the combination of ingredients in the Asparagus dish brings a complete balance to the plate, from the ikura eggs to the finger lime caviar.”
Only use edible elements: Avoid decorative garnishes that don’t belong on the fork.
Echo or enhance flavor: Use herbs, oils, citrus, or pickled elements that complement what’s already on the plate.
Keep it minimal: One or two thoughtful garnishes go further than a handful of scattered microgreens.
Add visual flair with intention: A well-placed garnish can guide the eye or create a focal point.
9. Maintain visual balance
Even the best ingredients can look off if they’re not arranged with care. Visual balance ensures that the plate feels harmonious and intentional, not crowded on one side or scattered randomly. Chef Sean MacDonald, whose geometric plating style has earned international acclaim, emphasized the power of restraint:
“Less is more on the plate, and utilize negative space… The negative space can add an artistic aspect to the dish.”
Distribute visual weight evenly: Keep heavier items (like proteins or starches) from dominating one side of the plate.
Use space strategically: Negative space can highlight key elements, but too much can feel empty.
Group with purpose: Cluster components thoughtfully instead of spreading them out without structure.
Step back and assess: Before sending it out, take a quick top-down look. Does it feel centered, stable, and appealing?
10. Align plating style with your brand
Your plating style should reflect your restaurant’s identity. Whether you’re casual and rustic or fine dining and refined, how you plate should feel cohesive with the experience you’re offering:
Classic/traditional: Clean lines, clear separation of components, often following the clock method. Great for timeless dishes and formal settings.
Contemporary/natural: Overlapping ingredients, organic flow, and a looser composition. Ideal for modern menus with seasonal flair.
Artistic/abstract: Bold techniques, asymmetry, and dramatic presentation. Works well in fine dining menus where creativity is expected.
What tools and equipment do you need to plate food like a chef?
The right equipment and tools give your team the precision they need to deliver consistent, polished plates every time. While you don’t need a fully stocked culinary toolbox to start plating like a chef, adding just a few of these essentials can go a long way toward leveling up your presentation.
Tweezers (various sizes): Perfect for placing microgreens, herbs, and delicate garnishes with accuracy. Offset tweezers offer better visibility and control.
Squeeze bottles: Great for dots, lines, and decorative drizzles. Stock a few with different tip sizes for detailed work.
Plating spoons: Use for saucing, dolloping, and shaping quenelles. Deep bowls and fine tips give you more control.
Ring molds: Useful for neatly stacking grains, tartare, or vegetables—and for building height and structure.
Offset spatulas: Ideal for moving delicate items or applying smooth sauces without smudging the plate.
Pastry or decorating brushes: For “painting” sauces, oils, or purees directly onto the plate.
Sharp knives: Clean, precise cuts are essential for visually appealing portions. Dull blades ruin presentation.
Mandolins: Help create ultra-thin, uniform slices—especially useful for chips, layered salads, or carpaccio.
Cookie cutters or vegetable cutters: Use to create clean, consistent shapes with fruits, vegetables, or even soft proteins.
Microplane or zester: Adds bright, aromatic finishing touches like citrus zest, hard cheese, or nutmeg.
Fine mesh sieve: Great for dusting powdered sugar, cocoa, or spices evenly across the plate.
How to plate food like a chef in 5 steps
Every great plate starts long before the garnish hits the rim. From planning your layout to adding the final touch, these steps walk you through the plating process the way chefs do it: with clarity, control, and creative flair.
1. Plan the plate before you touch the food
Great plating starts with intention. Before placing a single ingredient, take a few seconds to map out your vision. A well-planned plate is easier to execute and consistently looks better.
Visualize the layout: Use frameworks like the clock method or rule of thirds to guide placement.
Consider balance and color: Think about how different elements will contrast or complement one another.
Think through the structure: Will sauces stay in place? Will the components hold their shape from kitchen to table?
Design with service in mind: Make sure the layout is practical for plating at scale and holds up until the guest’s first bite.
2. Set up your mise en place for plating
Plating isn’t just about creativity—it’s about execution. A smooth plating process starts with thoughtful prep.
Keep components ready to go: All ingredients should be fully cooked, seasoned, and at serving temperature.
Use temperature-appropriate plates: Warm plates for hot dishes, chilled plates for cold ones.
Organize your tools: Have tweezers, squeeze bottles, plating spoons, and brushes within reach.
Create a clean workspace: Clear counters make for cleaner plates, as well as faster, more focused execution.
3. Place your core components
Start with the main elements of the dish. The protein (or whatever you want to highlight) should guide the rest of the composition.
Lead with the focal point: Position the protein or centerpiece first to anchor the layout.
Add the foundation: Place grains, purees, or starches to support and frame the plate’s structure.
Layer with intention: Stack or lean items to create depth and guide the eye naturally.
Avoid overcrowding: Give each component space to shine—less is often more.
4. Apply sauces with precision
Sauce may add flavor, but it’s also a design tool. However, the way you apply it can elevate or distract from the final plate.
Use the right tool for the effect: Try squeeze bottles for dots, spoons for swooshes, or brushes for bold strokes.
Place with purpose: Add sauce under, around, or on top of components depending on how you want the guest to experience it.
Keep it clean: Avoid smears, puddles, or oversaucing—precision matters.
Think flavor flow: Sauces should be easy to incorporate into each bite, not just look good on the plate.
5. Finish with finesse
The last few seconds before the plate leaves the pass are when the details matter most. This is your moment to elevate the dish from good to great.
Garnish with intention: Use edible elements that enhance flavor, texture, or color—never garnish just for looks.
Make final adjustments: Reposition components slightly to improve spacing or symmetry.
Wipe the rim: Clean the edges of the plate for a polished, professional finish.
Inspect from all angles: Take one last look from the guest’s perspective to ensure everything looks balanced and deliberate.
From home cook to plating food like a chef
You don’t need a fine dining background to start plating like a pro—just a strong foundation and a willingness to practice. Begin with the basics, like consistent cuts, proper composition, and simple sauce applications.
From there, improvement comes with intention. Take photos of your plates to evaluate them. Study how professional chefs plate their dishes in cookbooks, on social media, or in service. And practice individual techniques before combining them on the plate.
With time, attention to detail, and a little creativity, any cook can bring a chef’s level of precision to their food presentation.
Is this article helpful?
DISCLAIMER: This information is provided for general informational purposes only, and publication does not constitute an endorsement. Toast does not warrant the accuracy or completeness of any information, text, graphics, links, or other items contained within this content. Toast does not guarantee you will achieve any specific results if you follow any advice herein. It may be advisable for you to consult with a professional such as a lawyer, accountant, or business advisor for advice specific to your situation.


Subscribe to On the line
Sign up to get industry intel, advice, tools, and honest takes from real people tackling their restaurants' greatest challenges.
By submitting, you agree to receive marketing emails from Toast. We’ll handle your info according to our privacy statement. Additional information for California residents available here.